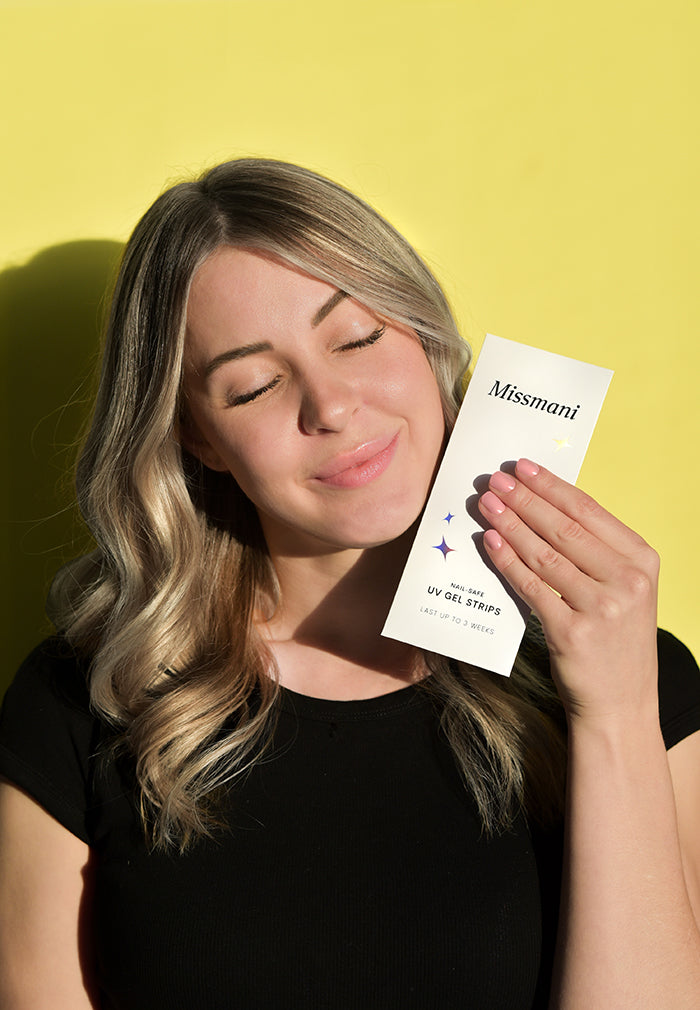
HOW - TO -GUIDE
The proper application and removal process for our UV-Gel Strips


Detailed step-by-step instructions
This is how you achieve the perfect manicure with Missmani Nails
Pro tips
Get the best results
To ensure the best results with your gel nail strips, there are a few important things to avoid
- First, keep your nails dry for an hour or two after application. Make sure not to apply the strips on your cuticle skin or on oily nails.
- Refrain from moisturizing your nails before application and try to avoid biting or frequently touching your nails.
- Avoid stretching the gel strips excessively and ensure the bed of your nail is even.
- Do not let the gel strips be longer than your natural nail length.
- Do not open the packaging under direct sunlight.
- If the strips are still soft after curing, they haven't been properly cured. More curing time is then needed.
- For added durability, shine, and thickness simply apply any clear UV top coat.
Beauty and simplicity, all in one! Following these guidelines will help you achieve a long-lasting, flawless manicure.
If you are having problems with the application our customer service colleagues will be happy to help you!
What you will need
- Missmani UV Gel Strips package includes
- Semi-Cured UV Gel strips
- a nail file
- a cuticle tool
- alcohol prep pads
- UV Lamp
- Nail scissors or a nail file
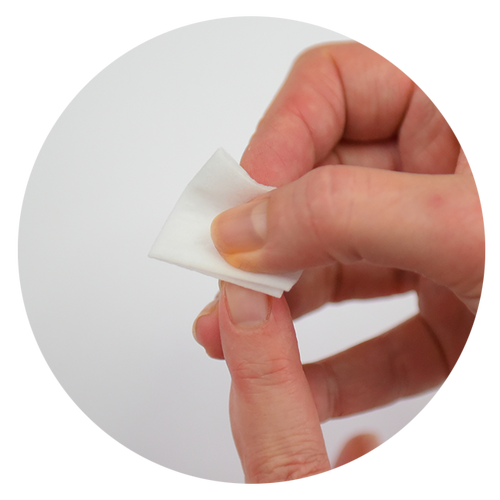
Prep your nails
- PREP YOUR NAILS - Wash your hands with soap and water. Avoid moisturizing your nails before application. This way, you ensure the nails are completely dry and oil-free. Ensure your hands and nails are completely oil-free and dry. Wipe your nails with an alcohol pad provided in the Missmani package to eliminate any residue soap, moisturizers, and oils, ensuring an ideal clean base for long-lasting manicures.
It is best to do your application indoors, avoiding direct sunlight. The natural UV light from outside can cause your UV Gel Strips to harden within seconds.
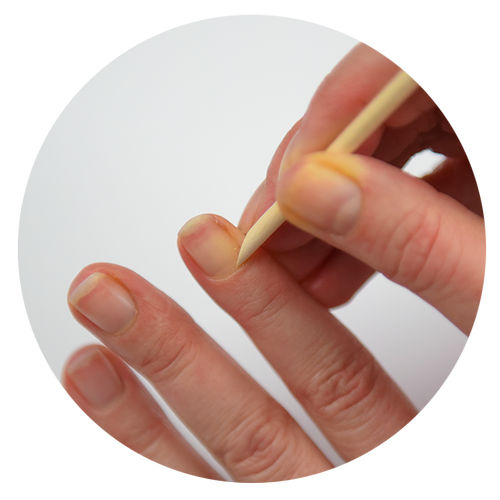
Push Back Cuticles
- PUSH BACK CUTICLES - To prolong your UV Gel Manicure, use the wooden applicator to push back cuticles. You can use cuticle scissors to cut off extra cuticles. Avoid applying strips on cuticles. Applying close to or on cuticle skin and to the edges of the nail can cause the gel strip to lift on the sides and eventually fall off.
- APPLY ON NAILS WITH SOME LENGTH - For best results and durability if used on clean and non-brittle nails that have some length. If you have very stressed & brittle nails, wait until your nails have recovered before using Missmani nail strips. Your free edge should be at least 2mm long over your smile line.
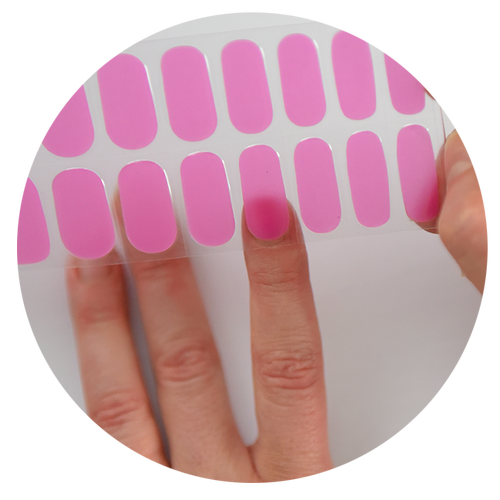
Choose The Right Size
- CHOOSE THE RIGHT SIZE - Hold them over your nails and opt for smaller sizes if uncertain. Avoid touching the underlayer of each nail.
Do not open UV strips sealed package under direct sunlight or when the UV lamp is on. Gel strips lose their flexibility and stretchiness when exposed to sunlight and they might harden. The degree of hardening depends on the duration of exposure, which can impact their ability to adhere to the nail and their overall durability.
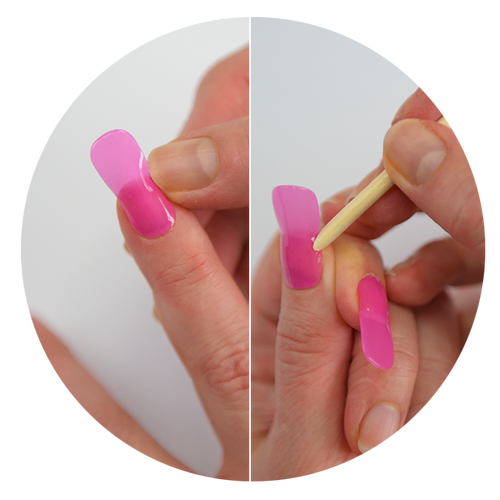
Press On
- PRESS THE UV GEL STRIP ON - Apply the UV Gel Strips on the nails, gently but firmly pressing them from the center outwards, avoiding application onto the cuticles. Ensure a firm attachment by pressing them onto the nail with the applicator tool, significantly enhancing their durability. Ensure that the strips are firmly attached to all sides of the nails before curing them under the UV light.
- Although gel nail strips can be stretched to fit the nails properly, stretching them too much can distort their design or make the glue less effective.
If your nail bed is uneven from previous artificial nail applications or has other damage: If this is the case, especially after using a real gel manicure, the nails may be quite damaged and uneven. Ensure to smooth your nail bed gently to even out the surface. UV strip might not attach to the uneven grooves of the nails.
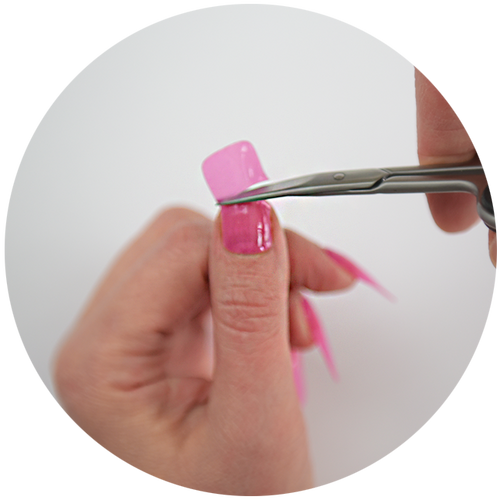
Trim
- EDGE FINISHING - Trim the ends to match your nail length. Strips are not to be used as extensions. Fold any excess strip over and under your nail tips to fully cover the nail edge before curing.
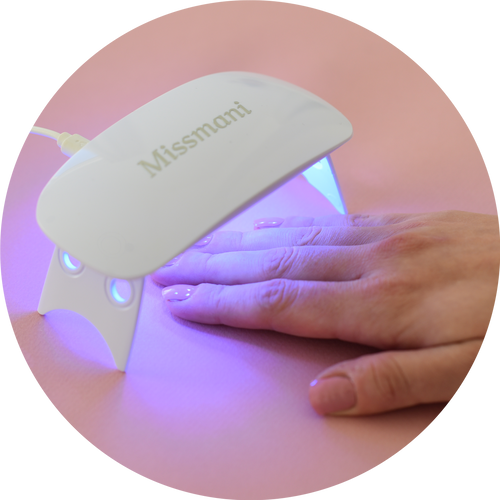
Cure Under the UV Light
Do not open UV strips sealed package under direct sunlight or when the UV lamp is on. Gel strips lose their flexibility and stretchiness when exposed to sunlight and they might harden. The degree of hardening depends on the duration of exposure, which can impact their ability to adhere to the nail and their overall durability. To ensure optimal performance, always apply your gel strips indoors, away from direct sunlight. Connect the UV Lamp to a power source and push the small white power button on behind the lamp.
- Place your index, middle, ring, and little fingers centred under the lamp for at least 1 minute (or until cured). Lamp cycle is 60 seconds and turns off automatically. Do the same step with your thumbs.
- If the strips are still soft after curing, they haven't been properly cured. We recommend 1 to 2 minutes of curing time with our UV lamp. To check if the gel is fully cured, press the tip of the included wooden cuticle stick onto the strip. If it leaves a mark, continue curing for a bit longer.
- For added durability, shine, and thickness simply apply any clear UV top coat and cure a bit more. Do not forget to apply UV top coat to nail edges.
Caution: Avoid direct exposure to the UV Lamp light and do not look inside the UV lamp when in use. Keep away from children.
Important notice: Please do not apply under sunlight or outdoors in the shade! Do not let the strips be exposed to sunlight.
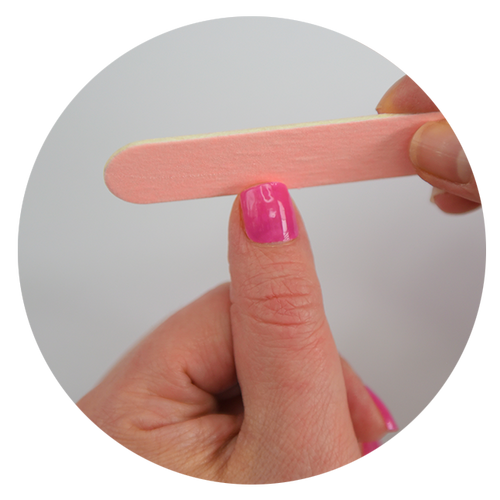
File
- Gently file the UV Gel Strips using a nail file, filing in one direction and downward to avoid damage. Avoid vertical, upwards filing motions.
- Make sure the gel strips are precisely trimmed and filed to the edge of your natural nails and no longer, as they could peel off more easily.
- Make sure to soften the corners of the nails to avoid any sharp edges.
Enjoy your new fabulous nails!
How to remove Missmani Nails
This is how you remove your Missmani nails without damage
Easy Removal - What you will need
- Missmani applicator tool for removal
- Warm water
- Acetone or cuticle oil if desired
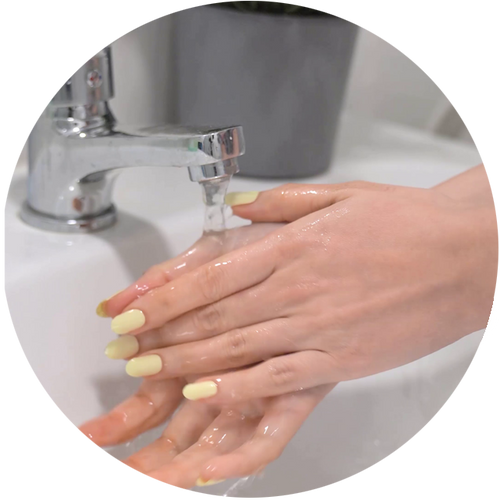
Wash Hands
Missmani Nails are much gentler for your nails than regular gel or acrylic manicures at salons. They are removed gently without milling, filing, harmful fumes, microplastic powders, or acetone. Just remember to take your time during removal and follow the instructions. If your nails are damaged, give them extra care and moisturize between applications. You can start the removal process by soaking fingers in warm water first for a couple of minutes. Apply cuticle oil if desired.
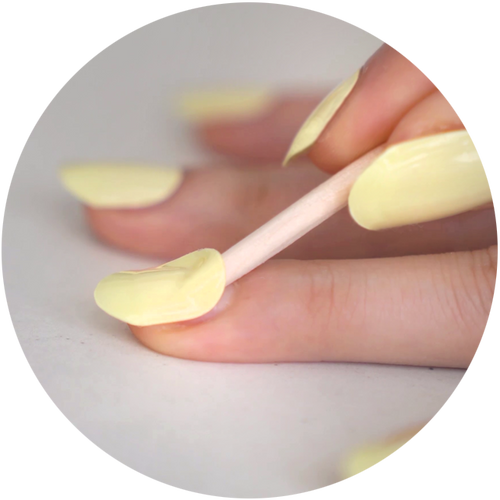
Lift to Remove
- Use the wooden applicator provided with your package. Work gently to avoid damage to nails. Never pull strips off forcefully.
- Use the soaked applicator to loosen the adhesive between the nail and strip, working from side to side (against the nail growth direction). You can use any cosmetic oil. Be patient and take your time. Carefully lift the strip from one side to remove it.
Important notice: Please do not apply under sunlight or outdoors in the shade!